Setup a ViciDial Cluster with scratch installs

Step 1 – Install Vicidial on each server
Install ViciDial with the Vicidial Debian 11 auto installer on each server.
Repeat this process on each server and then move on to step 2.
Step 2 – Turn off
services not needed on each server role
Now we need to disable services not needed on each server to save on resources, but this way they are there if they are needed in the future.
DB Server: systemctl disable apache2
Web Server: systemctl disable mysql
Asterisk Servers: systemctl disable mysql
We want to leave Apache running on the asterisk servers so we can install WebRTC for agents / admin webphones.
Step
3 – Run the install.pl script on each server
Now we want to link them all together by running the install.pl
script located in the source directory for vicidial, follow the following
commands to get to and run it:
perl install.pl
Now follow the prompt and answer them accordingly. make sure you
set the IP for the DB server on all the rest instead of localhost.

WEB+DB Server
Asterisk Servers

Only use 5 and 7 on ONE
asterisk server, not all, the rest put 123468
Make sure you only put 5 and 7
keepalives on one asterisk server, the rest you should only choose 123468.

apt-get install libc6-i386
then run "perl /usr/share/astguiclient/ip_relay/relay_control restart"
Got registered
Step
4 – Add them to the GUI for ViciDial
Now we need to add them into the GUI for Vicidial by going to
Admin then servers

click “Add a new server”

Now for the DB and web server turn the options to N(no) where
you see highlighted below:
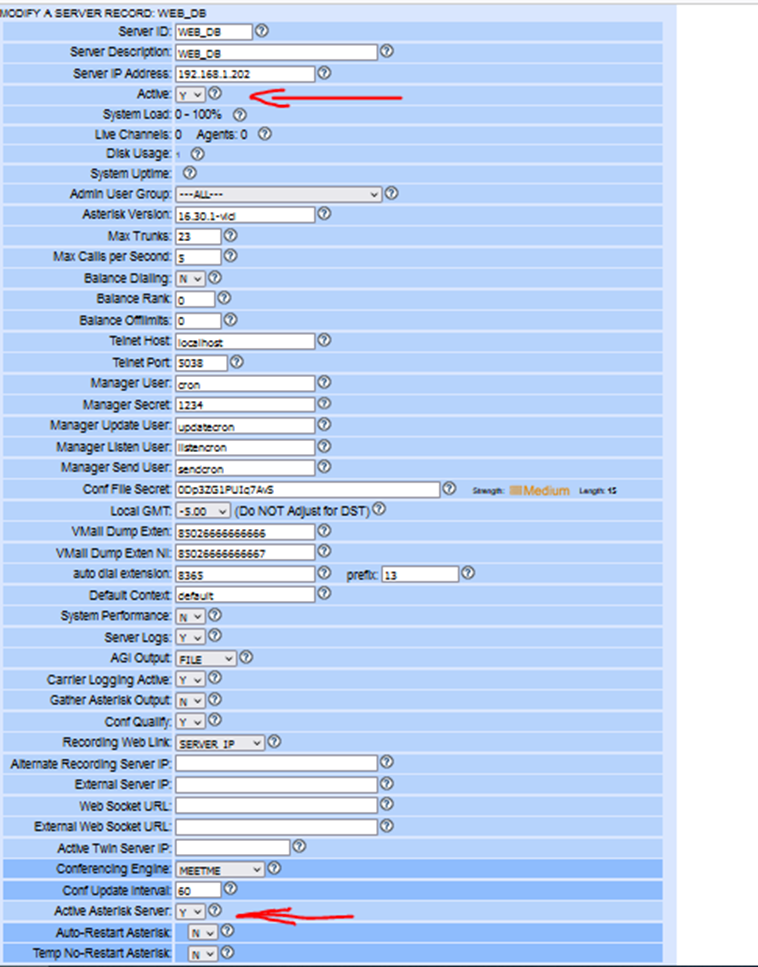

Active:N
Active Asterisk Server:N
Active Agent Server:N
Step
5 – Add conferences
Add conferences for each asterisk server
NOTE: THIS IS TO BE DONE
ON THE DATABASE SERVER.
use asterisk;
#This will delete if any conferences
are available for WEB and DB
delete from conferences;
delete from vicidial_conferences;
> insert into `conferences` ( conf_exten, server_ip, extension ) select conf_exten, '192.168.AST.SERV, '' from conferences where server_ip='192.168.10.10' limit 49;
Repeat this query with the IP address of each of the new
servers.
insert into `vicidial_conferences` ( conf_exten, server_ip, extension, leave_3way ) select conf_exten, '192.168.AST.SERV ', '', '' from vicidial_conferences where server_ip='192.168.10.10' limit 249;
Replace 192.168.AST.SERV with the ip address of the server you are adding. Replace 192.168.10.10 with the IP address of the Database server
Repeat this query with the IP address of
each of the new servers.
Step
6 – Create Template for WebRTC Phones
Template ID: webRTC
Template Name: webRTC
Template Contents: Copy paste below Lines
type=friend
host=dynamic
context=default
encryption=yes
avpf=yes
icesupport=yes
directmedia=no
transport=wss
force_avp=yes
dtlsenable=yes
dtlsverify=no
dtlscertfile=/etc/letsencrypt/live/example.com/fullchain.pem
dtlsprivatekey=/etc/letsencrypt/live/example.com/privkey.pem
dtlssetup=actpass
rtcp_mux=yes
change example.com to your domain name.
Step
6 – Add Phones
Use Report -> Admin Utilities -> Bulk Phone Insert Page
This will create Phone in all the Asterisk
servers with load balance Alias.

Step
7 – Load Balance using Vicidial Load Balancing
NOTE: if you have a dedicated MySQL
database server with a lot of RAM(8GB or greater) then you should consider
running the following MySQL queries to turn heavily used tables into MEMORY
tables to speed up execution and reduce load on your database server:
ALTER TABLE vicidial_live_agents MODIFY closer_campaigns VARCHAR(8000) default '';
ALTER TABLE vicidial_live_agents MODIFY external_ingroups VARCHAR(8000) default '';
ALTER TABLE vicidial_live_agents MODIFY agent_territories VARCHAR(1000) default '';
ALTER TABLE vicidial_live_agents ENGINE=MEMORY;
ALTER TABLE vicidial_manager ENGINE=MEMORY;
USE OF AGENT-ONLY AND DIAL-ONLY SERVERS ON YOUR CLUSTER:
If you are using servers where agents only log in and handle calls, but no calls are placed out from it, then you can use the new delay options on those servers to enhance efficient operations. The --autodial-delay=X option in the ADMIN_keepalive_ALL.pl script will allow you to set the delay to 100 milliseconds for these agent-only servers(the default is 2500ms). Lowering the delay for agent-only servers makes the auto-dial FILL process more responsive to the changes in the agent state on the agent-only servers which will enhance how your cluster operates. You can also use the --adfill-delay=X CLI option for the ADMIN_keepalive_ALL.pl script on the server that is running the FILL process and lower it as well if you have a larger cluster. The default of that process is also 2500ms, but you can lower it down to 500ms if needed.
!!!!!!!!!!!!!!!!!!!!!!!!!!!!!!!!!!!!!!!!!!!!!!!!!!!!!!!!!!!!!!!!!!!!!!!!!!!!!!!!!!!!!!!!!!!!
AS OF RELEASE 2.2.0 YOU SHOULD NOT
HAVE TO TAKE ANY STEPS BEYOND STEP 2 IN THIS DOCUMENT TO GET MULTI-SERVER
VICIDIAL TO WORK IF YOU ARE USING THE DEFAULT VICIDIAL CONF FILES.
!!!!!!!!!!!!!!!!!!!!!!!!!!!!!!!!!!!!!!!!!!!!!!!!!!!!!!!!!!!!!!!!!!!!!!!!!!!!!!!!!!!!!!!!!!!!
1. The VICIDIAL/Asterisk servers
need to have all of the perl scripts and cron jobs installed on them, except
these which only need to be on one of the servers:
- AST_VDhopper.pl (crontab)
- AST_cleanup_agent_log.pl (crontab)
- ADMIN_adjust_GMTnow_on_leads.pl (crontab)
- AST_DB_optimize.pl (crontab)
- AST_VDadapt.pl (defined in /etc/astguiclient.conf)
- AST_VDauto_dial_FILL.pl (defined in /etc/astguiclient.conf)
- ADMIN_archive_log_tables.pl (crontab)
- AST_DB_dead_cb_purge.pl (crontab)
- AST_flush_DBqueue.pl (crontab)
2. The VARactive_keepalives
variable in /etc/astguiclient.conf should have "5", "7" and
"E" on only ONE SERVER in your entire dialer setup, the other servers
should not have 5 or 7 in that field.
# 1 - AST_update
# 2 - AST_send_listen
# 3 - AST_VDauto_dial
# 4 - AST_VDremote_agents
# 5 - AST_VDadapt (If multi-server system, this must only be on one server)
# 6 - FastAGI_log
# 7 - AST_VDauto_dial_FILL (only for multi-server, this must only be on one server)
# E - AST_email (If multi-server system, this must only be on one server)
(NOTE: the install.pl script now has an option to generate the following settings and print them out to the screen so that you do not have to manually build them. ./install.pl --build_multiserver_conf)
3. The two servers need to be
registered to each other as IAX2 friends:
SERVER ONE(ASTtest1-10.10.10.15)
iax.conf:
register => ASTtest1:test@10.10.10.16
[ASTtest2]
type=friend
accountcode=IAXtrunk2
context=default
auth=plaintext
host=dynamic
permit=0.0.0.0/0.0.0.0
secret=test
qualify=yes
SERVER TWO(ASTtest2-10.10.10.16)
iax.conf:
register => ASTtest2:test@10.10.10.15
[ASTtest1]
type=friend
accountcode=IAXtrunk1
context=default
auth=plaintext
host=dynamic
permit=0.0.0.0/0.0.0.0
secret=test
qualify=yes
4. The two servers need to have
wildcard extensions assigned to the other server in the dialplan:
## NOTE: the "010*010*010*015" is the IP address of the server as defined in
the /etc/astguiclient.conf file
SERVER ONE(ASTtest1-10.10.10.15)
extensions.conf:
[globals]
TRUNKIAX2=IAX2/ASTtest1:test@10.10.10.16
[default]
exten => _010*010*010*015*.,1,Goto(default,${EXTEN:16},1)
exten => _010*010*010*016*.,1,Dial(${TRUNKIAX2}/${EXTEN:16},55,o)
exten => _8600XXX*.,1,AGI(agi-VDADfixCXFER.agi)
exten => _78600XXX*.,1,AGI(agi-VDADfixCXFER.agi)
SERVER TWO(ASTtest2-10.10.10.16)
extensions.conf:
[globals]
TRUNKIAX1=IAX2/ASTtest2:test@10.10.10.15
[default]
exten => _010*010*010*015*.,1,Dial(${TRUNKIAX1}/${EXTEN:16},55,o)
exten => _010*010*010*016*.,1,Goto(default,${EXTEN:16},1)
exten => _8600XXX*.,1,AGI(agi-VDADfixCXFER.agi)
exten => _78600XXX*.,1,AGI(agi-VDADfixCXFER.agi)
5. For BOTH servers the VDAD extens need to be setup there as well for the Load-Balance and Load-Balance-Overflow AGI scripts, as well as setting up the closer and inbound extens if needed(these should already be part of the default extensions.conf):
; VICIDIAL_auto_dialer transfer script Load Balance Overflow:
exten => 8367,1,Playback(sip-silence)
exten => 8367,2,AGI(agi://127.0.0.1:4577/call_log)
exten => 8367,3,AGI(agi-VDAD_ALL_outbound.agi,NORMAL-----LO)
exten => 8367,4,AGI(agi-VDAD_ALL_outbound.agi,NORMAL-----LO)
exten => 8367,5,Hangup
; VICIDIAL_auto_dialer transfer script Load Balanced:
exten => 8368,1,Playback(sip-silence)
exten => 8368,2,AGI(agi://127.0.0.1:4577/call_log)
exten => 8368,3,AGI(agi-VDAD_ALL_outbound.agi,NORMAL-----LB)
exten => 8368,4,AGI(agi-VDAD_ALL_outbound.agi,NORMAL-----LB)
exten => 8368,5,Hangup
; Below are the parameters needed for the script to be run properly
; 1. the method of call handling for the script:
; - CID - CID received, add record with phone number
; - CIDLOOKUP - Lookup CID to find record in whole system
; - CIDLOOKUPRL - Restrict lookup to one list
; - CIDLOOKUPRC - Restrict lookup to one campaign's lists
; - CLOSER - Closer calls from VICIDIAL fronters
; - ANI - ANI received, add record with phone number
; - ANILOOKUP - Lookup ANI to find record in whole system
; - ANILOOKUPRL - Restrict lookup to one list
; - 3DIGITID - Enter 3 digit code to go to agent
; - 4DIGITID - Enter 4 digit code to go to agent
; - 5DIGITID - Enter 5 digit code to go to agent
; - 10DIGITID - Enter 10 digit code to go to agent
; 2. the method of searching for an available agent:
; - LO - Load Balance Overflow only (priority to home server)
; - LB - <default> Load Balance total system
; - SO - Home server only
; 3. the full name of the IN GROUP to be used in vicidial for the inbound call
; 4. the phone number that was called, for the log entry
; 5. the callerID or lead_id of the person that called(usually overridden)
; 6. the park extension audio file name if used
; 7. the status of the call initially(usually not used)
; 8. the list_id to insert the new lead under if it is new (and CID/ANI available)
; 9. the phone dialing code to insert with the new lead if new (and CID/ANI available)
; 10. the campaign_id to search within lists if CIDLOOKUPRC
;inbound VICIDIAL calls:
exten => 1234,1,Answer ; Answer the line
exten => 1234,2,AGI(agi-VDAD_ALL_inbound.agi,CID-----LB-----INB-----7274515134-----Closer-----park----------999-----1-----OUTB)
exten => 1234,3,Hangup
; inbound VICIDIAL transfer calls [can arrive through PRI T1 crossover, IAX or SIP channel]
exten => _90009.,1,Answer ; Answer the line
exten => _90009.,2,AGI(agi-VDAD_ALL_inbound.agi,CLOSER-----LB-----CL_TESTCAMP-----7275551212-----Closer-----park----------999-----1)
exten => _90009.,3,Hangup
exten => _990009.,1,Answer ; Answer the line
exten => _990009.,2,AGI(agi-VDAD_ALL_inbound.agi,CLOSER-----LB-----CL_TESTCAMP-----7275551212-----Closer-----park----------999-----1)
exten => _990009.,3,Hangup
6. Reload both Asterisk servers and for outbound change the VDAD exten in the campaign detail screens to 8367 or 8368 and kill the AST_VDauto_dial.pl scripts on both servers so they can restart and you can now look at the AST_timeonVDADall.php page(per campaign time-on-VDAD available from the STATS and REPORTS link on the vicidial admin screen) that will allo you to see the server_ip of the agent and the server_ip of the call per campaign across all campaigns.
If you have any questions or problems please post to the astguiclient-users list(link available on the project website)
7. For multi-server VICIDIAL/astGUIclient installations these cron scripts only need to be set up and run on one of the servers:
- AST_VDhopper.pl (crontab)
- AST_cleanup_agent_log.pl (crontab)
- ADMIN_adjust_GMTnow_on_leads.pl (crontab)
- AST_DB_optimize.pl (crontab)
- AST_VDadapt.pl (defined in /etc/astguiclient.conf)
- AST_VDauto_dial_FILL.pl (defined in /etc/astguiclient.conf)
- ADMIN_archive_log_tables.pl (crontab)
- AST_flush_DBqueue.pl (crontab)
8. On all servers but one you should DELETE the following line from your extensions.conf:
; prompt recording AGI script, ID is 4321
exten => 8167,1,Answer
exten => 8167,2,AGI(agi-record_prompts.agi,wav-----720000)
exten => 8167,3,Hangup
exten => 8168,1,Answer
exten => 8168,2,AGI(agi-record_prompts.agi,gsm-----720000)
exten => 8168,3,Hangup
This should help to prevent overwriting of prompts that are copied over from the one server that is used to do prompt creation.
Or you can simply redirect to the server that does have the recordings on it:
exten => 8167,1,Dial(${TRUNKIAX2}/${EXTEN},55,o)
exten => 8168,1,Dial(${TRUNKIAX2}/${EXTEN},55,o)
9. On all servers but one you should consider redirecting voicemail direct calls to a single server:
Change this:
exten => _85026666666666.,1,Wait(1)
exten => _85026666666666.,2,Voicemail(${EXTEN:14}|u)
exten => _85026666666666.,3,Hangup
To something like this:
exten => _85026666666666.,1,Dial(${TRUNKIAX2}/${EXTEN},55,o)
Change this:
exten => 8500,1,VoicemailMain
exten => 8500,2,Goto(s,6)
To something like this:
exten => 8500,1,Dial(${TRUNKIAX2}/${EXTEN},55,o)
Change this:
exten => 8501,1,VoicemailMain(s${CALLERIDNUM})
exten => 8501,2,Hangup
To something like this:
exten => 8501,1,Dial(${TRUNKIAX2}/${EXTEN},55,o)
THREE VICIDIAL SERVER LOAD BALANCING SETUP:
The only steps that are different as you add more load-balanced servers are steps 2 and 3:
3. The three servers need to be registered to each other as IAX2 friends:
SERVER ONE(ASTtest1-10.10.10.15)
iax.conf:
register => ASTtest1:test@10.10.10.16
register => ASTtest1:test@10.10.10.17
[ASTtest2]
type=friend
accountcode=IAXtrunk2
context=default
auth=plaintext
host=dynamic
permit=0.0.0.0/0.0.0.0
secret=test
qualify=yes
[ASTtest3]
type=friend
accountcode=IAXtrunk3
context=default
auth=plaintext
host=dynamic
permit=0.0.0.0/0.0.0.0
secret=test
qualify=yes
SERVER TWO(ASTtest2-10.10.10.16)
iax.conf:
register => ASTtest2:test@10.10.10.15
register => ASTtest2:test@10.10.10.17
[ASTtest1]
type=friend
accountcode=IAXtrunk1
context=default
auth=plaintext
host=dynamic
permit=0.0.0.0/0.0.0.0
secret=test
qualify=yes
[ASTtest3]
type=friend
accountcode=IAXtrunk3
context=default
auth=plaintext
host=dynamic
permit=0.0.0.0/0.0.0.0
secret=test
qualify=yes
SERVER THREE(ASTtest3-10.10.10.17)
iax.conf:
register => ASTtest3:test@10.10.10.15
register => ASTtest3:test@10.10.10.16
[ASTtest1]
type=friend
accountcode=IAXtrunk1
context=default
auth=plaintext
host=dynamic
permit=0.0.0.0/0.0.0.0
secret=test
qualify=yes
[ASTtest2]
type=friend
accountcode=IAXtrunk2
context=default
auth=plaintext
host=dynamic
permit=0.0.0.0/0.0.0.0
secret=test
qualify=yes
4. The three servers need to have wildcard extensions assigned to the other server in the dialplan:
SERVER ONE(ASTtest1-10.10.10.15)
extensions.conf:
[globals]
TRUNKIAX2=IAX2/ASTtest1:test@10.10.10.16
TRUNKIAX3=IAX2/ASTtest1:test@10.10.10.17
[default]
exten => _010*010*010*015*.,1,Goto(default,${EXTEN:16},1)
exten => _010*010*010*016*.,1,Dial(${TRUNKIAX2}/${EXTEN:16},55,o)
exten => _010*010*010*017*.,1,Dial(${TRUNKIAX3}/${EXTEN:16},55,o)
exten => _8600XXX*.,1,AGI(agi-VDADfixCXFER.agi)
exten => _78600XXX*.,1,AGI(agi-VDADfixCXFER.agi)
SERVER TWO(ASTtest2-10.10.10.16)
extensions.conf:
[globals]
TRUNKIAX1=IAX2/ASTtest2:test@10.10.10.15
TRUNKIAX3=IAX2/ASTtest2:test@10.10.10.17
[default]
exten => _010*010*010*015*.,1,Dial(${TRUNKIAX1}/${EXTEN:16},55,o)
exten => _010*010*010*016*.,1,Goto(default,${EXTEN:16},1)
exten => _010*010*010*017*.,1,Dial(${TRUNKIAX3}/${EXTEN:16},55,o)
exten => _8600XXX*.,1,AGI(agi-VDADfixCXFER.agi)
exten => _78600XXX*.,1,AGI(agi-VDADfixCXFER.agi)
exten => 8167,1,Dial(${TRUNKIAX1}/${EXTEN},55,o)
exten => 8168,1,Dial(${TRUNKIAX1}/${EXTEN},55,o)
exten => _85026666666666.,1,Dial(${TRUNKIAX1}/${EXTEN},55,o)
exten => 8500,1,Dial(${TRUNKIAX1}/${EXTEN},55,o)
exten => 8501,1,Dial(${TRUNKIAX1}/${EXTEN},55,o)
SERVER THREE(ASTtest3-10.10.10.17)
extensions.conf:
[globals]
TRUNKIAX1=IAX2/ASTtest2:test@10.10.10.15
TRUNKIAX2=IAX2/ASTtest2:test@10.10.10.16
[default]
exten => _010*010*010*015*.,1,Dial(${TRUNKIAX1}/${EXTEN:16},55,o)
exten => _010*010*010*016*.,1,Dial(${TRUNKIAX2}/${EXTEN:16},55,o)
exten => _010*010*010*017*.,1,Goto(default,${EXTEN:16},1)
exten => _8600XXX*.,1,AGI(agi-VDADfixCXFER.agi)
exten => _78600XXX*.,1,AGI(agi-VDADfixCXFER.agi)
exten => 8167,1,Dial(${TRUNKIAX1}/${EXTEN},55,o)
exten => 8168,1,Dial(${TRUNKIAX1}/${EXTEN},55,o)
exten => _85026666666666.,1,Dial(${TRUNKIAX1}/${EXTEN},55,o)
exten => 8500,1,Dial(${TRUNKIAX1}/${EXTEN},55,o)
exten => 8501,1,Dial(${TRUNKIAX1}/${EXTEN},55,o)
Example Audio Monitoring of Load Balancing agents on other servers:
exten => _589XXX,1,Goto(default,8600${EXTEN:3},1)
exten => _689XXX,1,Dial(${TRUNKIAX1}/08600${EXTEN:3},55,o)
exten => _789XXX,1,Dial(${TRUNKIAX2}/08600${EXTEN:3},55,o)
exten => _08600XXX,1,Dial(${TRUNKblind}/6${EXTEN:1},55,To)
Example of altering vicidial_conferences entries to make monitoring easier:
delete from vicidial_conferences where conf_exten < 8600100 and server_ip='192.168.1.101';
delete from vicidial_conferences where conf_exten > 8600199 and server_ip='192.168.1.101';
update vicidial_conferences set conf_exten = (conf_exten + 100) where server_ip='192.168.1.101';
Then add the following to your extensions.conf:
remove existing blind monitoring 08600XXX extension and replace with this:
; blind monitoring
exten => _086001XX,1,Dial(${TRUNKblind}/6${EXTEN:1},55,ot)
exten => _086002XX,1,Dial(${TRUNKvicidial2}/${EXTEN},55,ot)
exten => _086003XX,1,Dial(${TRUNKvicidial3}/${EXTEN},55,ot)
exten => _086004XX,1,Dial(${TRUNKvicidial4}/${EXTEN},55,ot)
Change the _8600[1-2]XX to just _86--1XX
in the meetme.conf
remove all conferences before 8600200 and after 8600299
(vi command for search and replace ":%s/86001/86002/g")
Step :- 8 Create PHP script to monitor Asterisk
Servers for Agent Login load balance
cd /opt/
nano ast_check.php
######START######
$server_ips = array(
'AST_1' => '23.81.164.168',
'AST_2' => '209.58.133.95'
);
// Database connection details
$servername = "localhost";
$username = "cron";
$password = "1234";
$database = "asterisk";
// Create connection
$conn = new mysqli($servername, $username, $password, $database);
// Check connection
if ($conn->connect_error) {
die("Connection failed: " . $conn->connect_error);
}
// Get current datetime in UNIX timestamp format
$current_timestamp = time();
// Prepare and execute the query for each server IP
foreach ($server_ips as $server_name => $server_ip) {
$sql = "SELECT last_update FROM server_updater WHERE server_ip = '$server_ip'";
$result = $conn->query($sql);
if ($result->num_rows > 0) {
// Fetch the last update timestamp for the server
$row = $result->fetch_assoc();
$last_update_timestamp = strtotime($row['last_update']);
// Check if the last update timestamp matches the current timestamp
if ($last_update_timestamp == $current_timestamp) {
// Update the active, active_asterisk_server and active_agent_login_server columns to 'Y'
$update_sql = "UPDATE servers SET active_asterisk_server = 'Y', active_agent_login_server = 'Y', active = 'Y' WHERE server_ip = '$server_ip'";
if ($conn->query($update_sql) === TRUE) {
echo "Updated $server_name: active, active_asterisk_server and active_agent_login_server set to 'Y'<br>";
} else {
echo "Error updating record: " . $conn->error;
}
} else {
// Calculate the difference in seconds between current time and last update time
$time_diff = $current_timestamp - $last_update_timestamp;
// Check if the difference is greater than 30 seconds
if ($time_diff > 20) {
// Update the active, active_asterisk_server and active_agent_login_server columns to 'N'
$update_sql = "UPDATE servers SET active_asterisk_server = 'N', active_agent_login_server = 'N', active = 'N' WHERE server_ip = '$server_ip'";
if ($conn->query($update_sql) === TRUE) {
echo "Updated $server_name: active, active_asterisk_server and active_agent_login_server set to 'N'<br>";
} else {
echo "Error updating record: " . $conn->error;
}
} else {
// Update the column to 'Y'
$update_sql = "UPDATE servers SET active_asterisk_server = 'N', active_agent_login_server = 'N', active = 'N' WHERE server_ip '$server_ip'";
if ($conn->query($update_sql) === TRUE) {
echo "Updated $server_name: active set to 'Y'<br>";
} else {
echo "Error updating record: " . $conn->error;
}
}
}
} else {
echo "No records found for $server_name<br>";
}
}
// Close connection
$conn->close();
?>
######END######
Above file is check asterisk status if asterisk stopped its prevent Agents to login and send login request to active server.
Add This file into the cron
nano /var/spool/cron/crontabs/root
* * * * * /usr/bin/php /opt/ast_check.php
##Sync Audio Files
3 * * * * /usr/share/astguiclient/ADMIN_audio_store_sync.pl
Comments
Post a Comment