How to – Setup a ViciDial Cluster
How to – Setup a ViciDial Cluster
This article is going to go over the steps I suggest to take in order to setup a ViciDial Cluster. I do things a little different when it comes to this to prepare for worst case scenario that a server may have problems and have to be taken offline, I install all services to each server, such as apache, mysql and asterisk this way if need be, they each can take on additional roles to cover for a server having to be taken out of production. Obviously this is going to assume you have ViciDial already installed on each server with all roles ready to go. I find V9 to be more stable.
Step 1 – Install Vicidial on each server
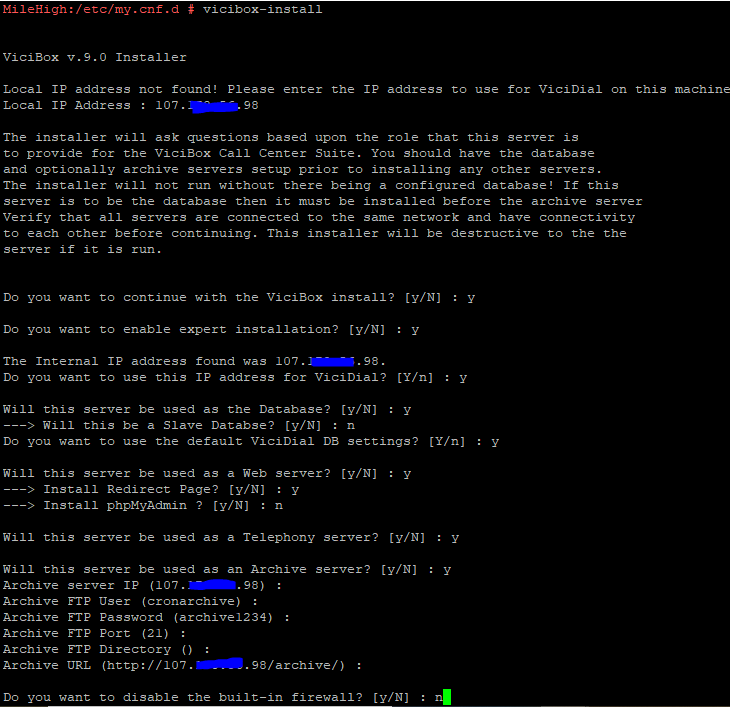
I suggest installing all services on each server and just leaving the ones not needed for each box, disabled until needed. So if you are using an ISO install instead of one of my scratch instructions, for the purpose on this article, lets say ViciBox v9.0.3. The first thing you need to do after loading v9 is to upgrade the operating system from Leap 15.1 to Leap 15.2 using these instructions, because Leap 15.1 is end of life(no more updates). After that use the command, vicibox-install and choose Y(yes) for the options shown in the picture below:
Repeat this process on each server and then move on to step 2.
Step 2 – Turn off services not needed on each server role
Now we need to disable services not needed on each server to save on resources, but this way they are there if they are needed in the future.
- DB Server: systemctl disable apache2;systemctl disable asterisk
- Web Server: systemctl disable mysql;systemctl disable asterisk
- Asterisk Servers: systemctl disable mysql
We want to leave apache running on the asterisk servers so we can install webrtc for webphones
Step 3 – Run the install.pl script on each server
Now we want to link them all together by running the install.pl script located in the source directory for vicidial, follow the following commands to get to and run it:
cd /usr/src/astguiclient/trunk
perl install.pl
Now follow the prompt and answer them accordingly. The pictures below will show the choices needed for each server role except make sure you set the IP for the DB server on all the rest instead of localhost.
DB Server and Web Server
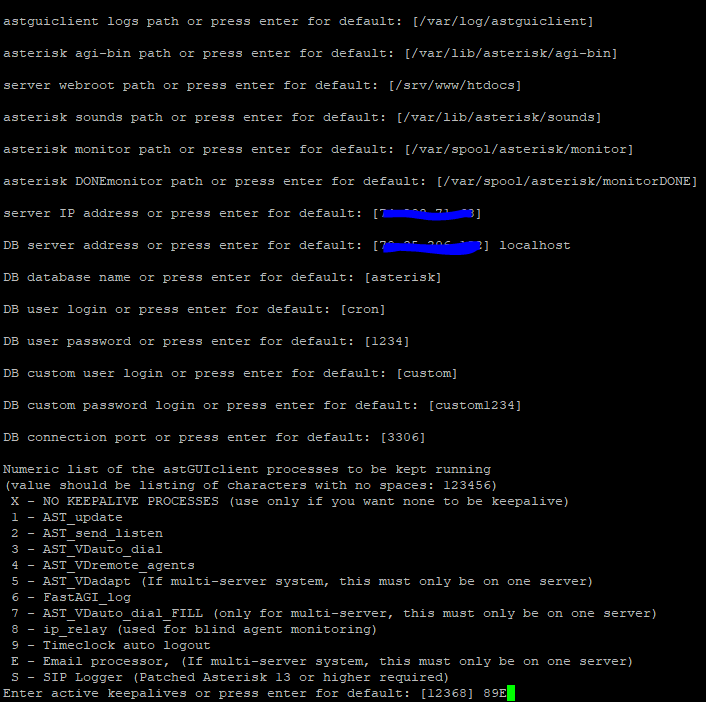
For the web server make sure you put the DB server IP instead of localhost
Asterisk Servers
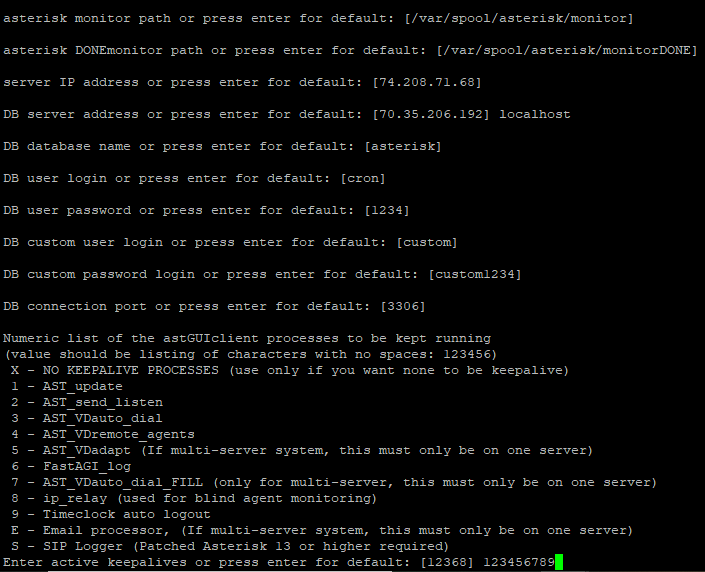
Make sure you only put 5 and 7 keepalives on one asterisk server, the rest you should only choose 123468.
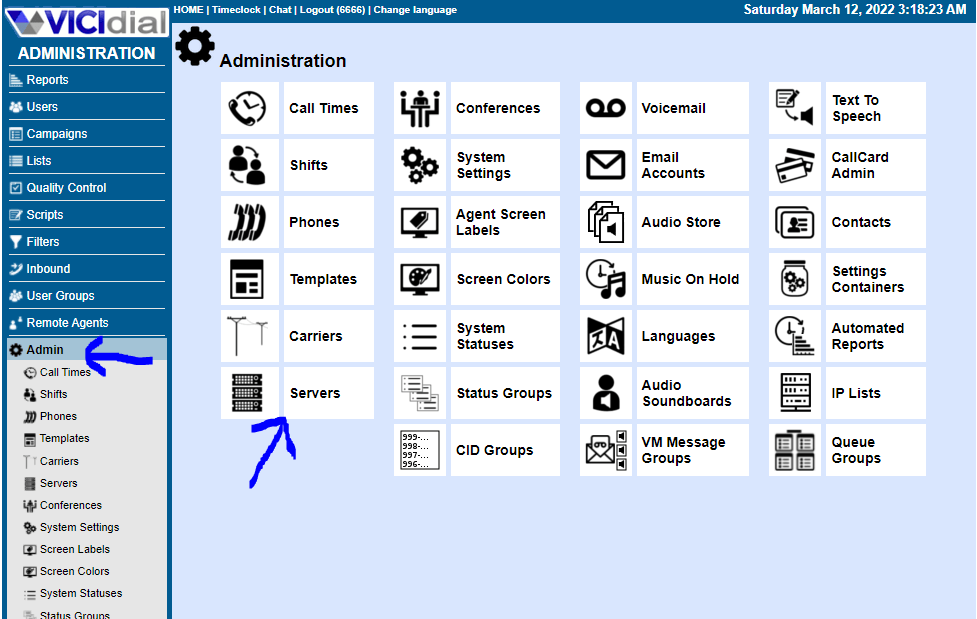
Step 4 – Add them to the GUI for ViciDial
Now we need to add them into the GUI for Vicidial by going to Admin then servers
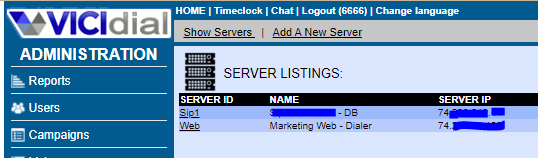
Once you are here, click “Add a new server”
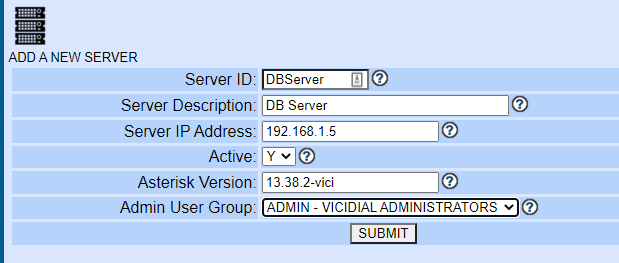
Fill out the fields accordingly and click submit
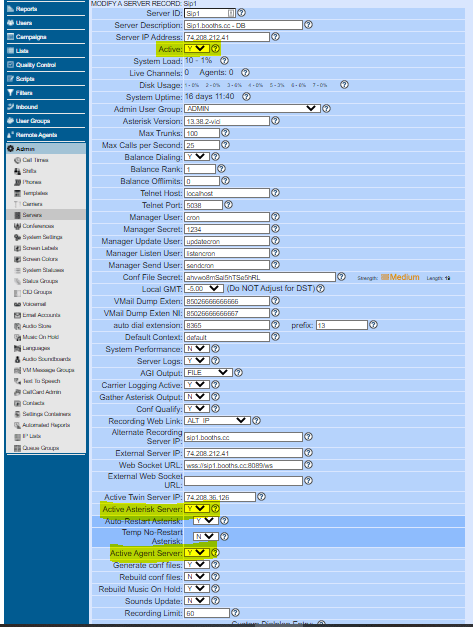
Now for the DB and web server turn the options to N(no) where you see highlighted below:
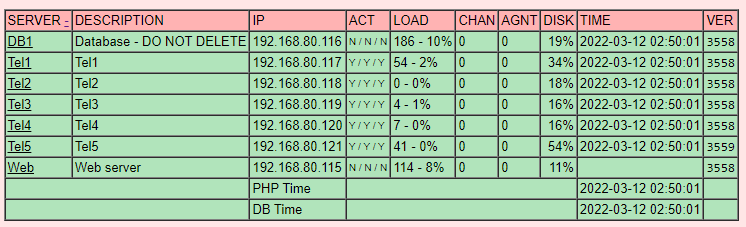
Now reboot all servers and then check your reports page to make sure all servers are set to green like shown below
That’s all there is to it, not as hard as you thought it would be, right? If you have any questions feel free to contact me,
- Get link
- X
- Other Apps
Comments
Post a Comment