How to – Setup Email for ViciDial reports and voicemail
This article will go over how to setup your email configuration on your server in order to get reports from ViciDial or to receive voicemail to email notifications and recordings. Gmail recently changed the way their security is handled so some changes need to be made in order for your emails to go through. You can alter the config below for any email service you may use.
Step 1 – Edit your postfix config file
Ok so first you need to edit your postfix configuration by editing main.cf and adding a few lines to the bottom of it.
nano /etc/postfix/main.cf
### Now paste the following lines to the bottom: ###
relayhost = [smtp.gmail.com]:587
smtp_sasl_auth_enable = yes
smtp_sasl_password_maps = lmdb:/etc/postfix/sasl_passwd
smtp_sasl_security_options = noanonymous
smtp_sasl_mechanism_filter = plain
smtp_use_tls = yes
Step 2 – Create a Gmail APP Password
- Go to Gmail and log in to your account.
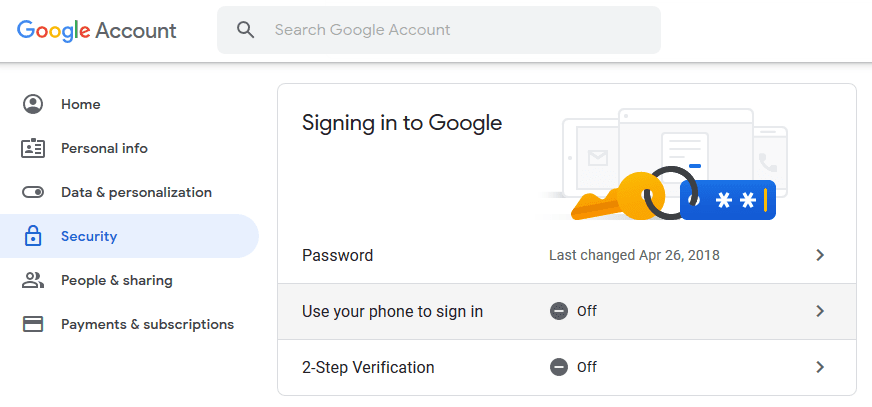
- Now, in the upper-right corner, click the Home Account icon. In the open wizard, click “Manage my Accounts.”
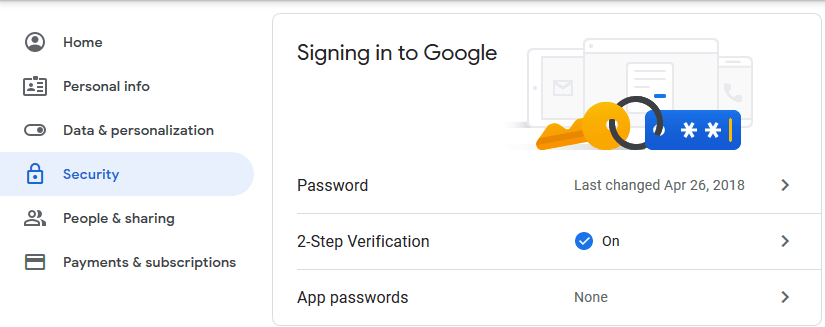
- You will be redirected to Gmail Settings. In the left tab, click Security, and then click ‘2-step verification’ in the ‘Signing into Google’ section.
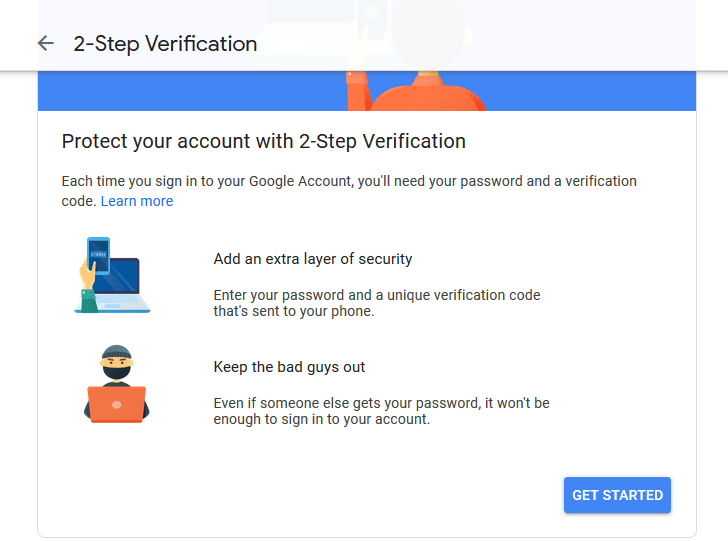
- The 2-step verification window will appear on the screen, click ‘Get started.’
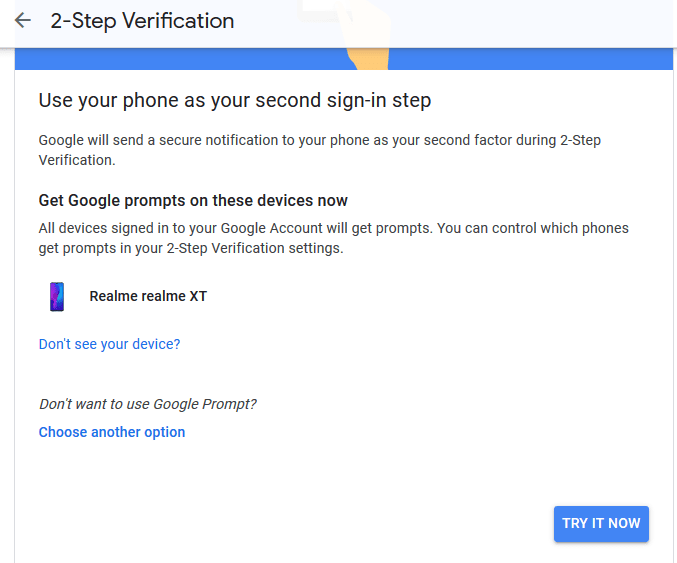
- In the next step, Google will ask you to use your phone as your second sign-in step. Click ‘Try it Now’ to move ahead. You will be asked to log in to Gmail again, and a notification will appear on your phone screen to confirm the sign-in, click Yes.
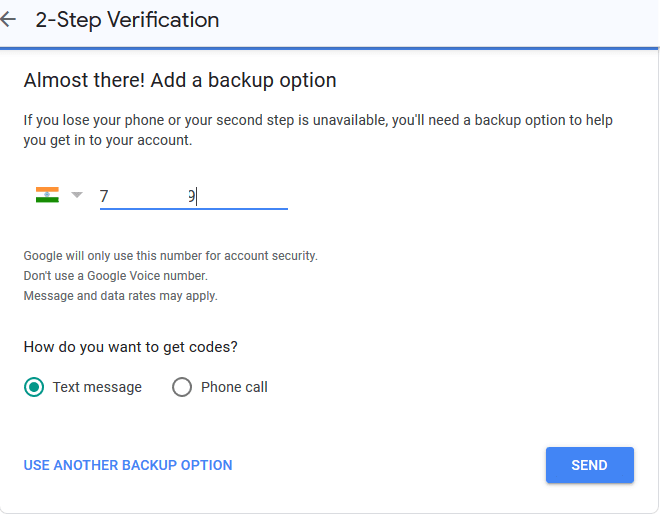
- After giving access from your phone, Google will ask you to add a backup option, enter your phone number, and click Send.
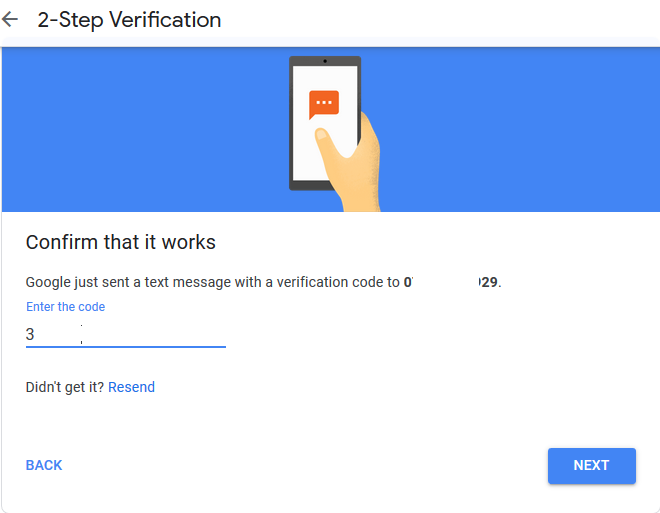
- A code will be sent to your phone to confirm the login, enter the code in the opened window and click ‘Next.’
2-step verification has been enabled. Now, you can easily create an App Password to login to third-party apps.
Creating App Passwords
- To create the App Password after enabling 2-step verification, go to ‘Manage your Account’ from the home tab.
- Now, in managing accounts, click the Security tab in the left pane, and then scroll down to ‘Signing to Google.’
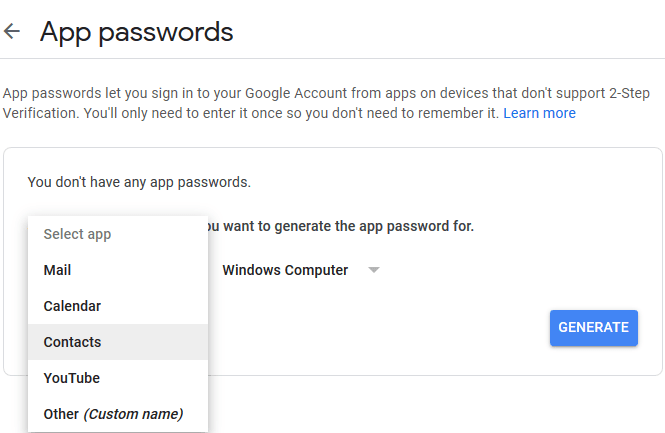
- Here, you’ll see the App Passwords option, click over it. You will be asked to sign in again to your Gmail account.
- After signing in, select the type of app and device for which you want to generate an app password and click Generate.
- The App Password will be created; you can copy it to the clipboard, and click ‘Done.’
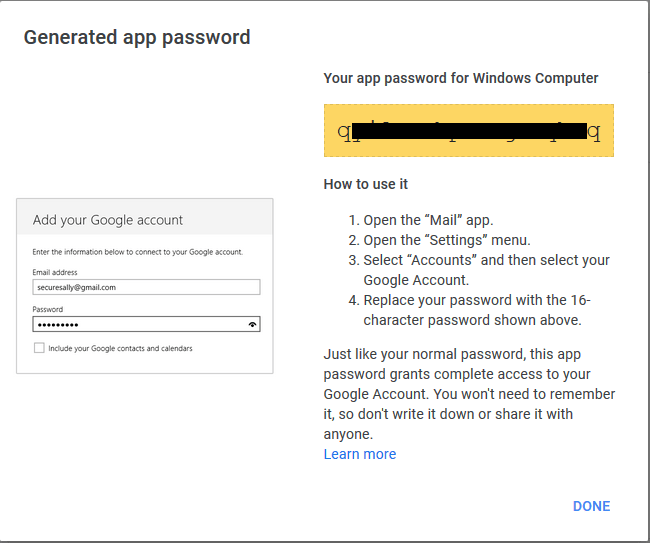
That’s how you can create App Password for your Gmail account. Now, you can use this Password to login to Gmail with your ViciDial server.
Step 3 – Edit your sasl_password file
Now you need to edit your sasl_password file as shown below:
nano /etc/postfix/sasl_passwd
### Alter the line below with your username and password ###
[smtp.gmail.com]:587 youremail@gmail.com:password
That’s all there is to it, now set your email account on your voicemail boxes or automated reports in ViciDial and you should be good to go.
I hope this helps.
- Get link
- X
- Other Apps
Comments
Post a Comment