Configuring Gmail as a Sendmail email relay
Sendmail is email routing software that can allow Linux systems to send an email from the command line. This allows you to send email from your bash scripts, hosted website, or from command line using themail command. Another example where you can utilize this setting is for notification purposes such as failed backups, etc.In this guide, we’ll go over the step by step instructions to configure Gmail as a relay for the sendmail client on Linux. Note that Sendmail is just one of many utilities which can be configured to rely on a Gmail account. Others that are capable of this include postfix, exim, ssmpt, etc. The instructions here should work for any mainstream Linux distribution.
In this tutorial you will learn:
- Gmail configuration prerequisites
- How to install Sendmail and mail utilities on Linux
- How to configure Gmail as a relay for Sendmail
- How to test the config by sending an email from command line
| Category | Requirements, Conventions or Software Version Used |
|---|---|
| System | Any Linux distro |
| Software | Sendmail, Gmail account |
| Other | Privileged access to your Linux system as root or via the sudo command. |
| Conventions |
# – requires given linux commands to be executed with root privileges either directly as a root user or by use of sudo command$ – requires given linux commands to be executed as a regular non-privileged user |
Gmail configuration prerequisites
In order to get Gmail set up as a relay for Sendmail, there are a couple of things you’ll need to do first.
The first prerequisite, which should be obvious, is that you’ll need a Gmail account or a Google Apps account (which is essentially a Gmail account that uses your own fully qualified domain name).
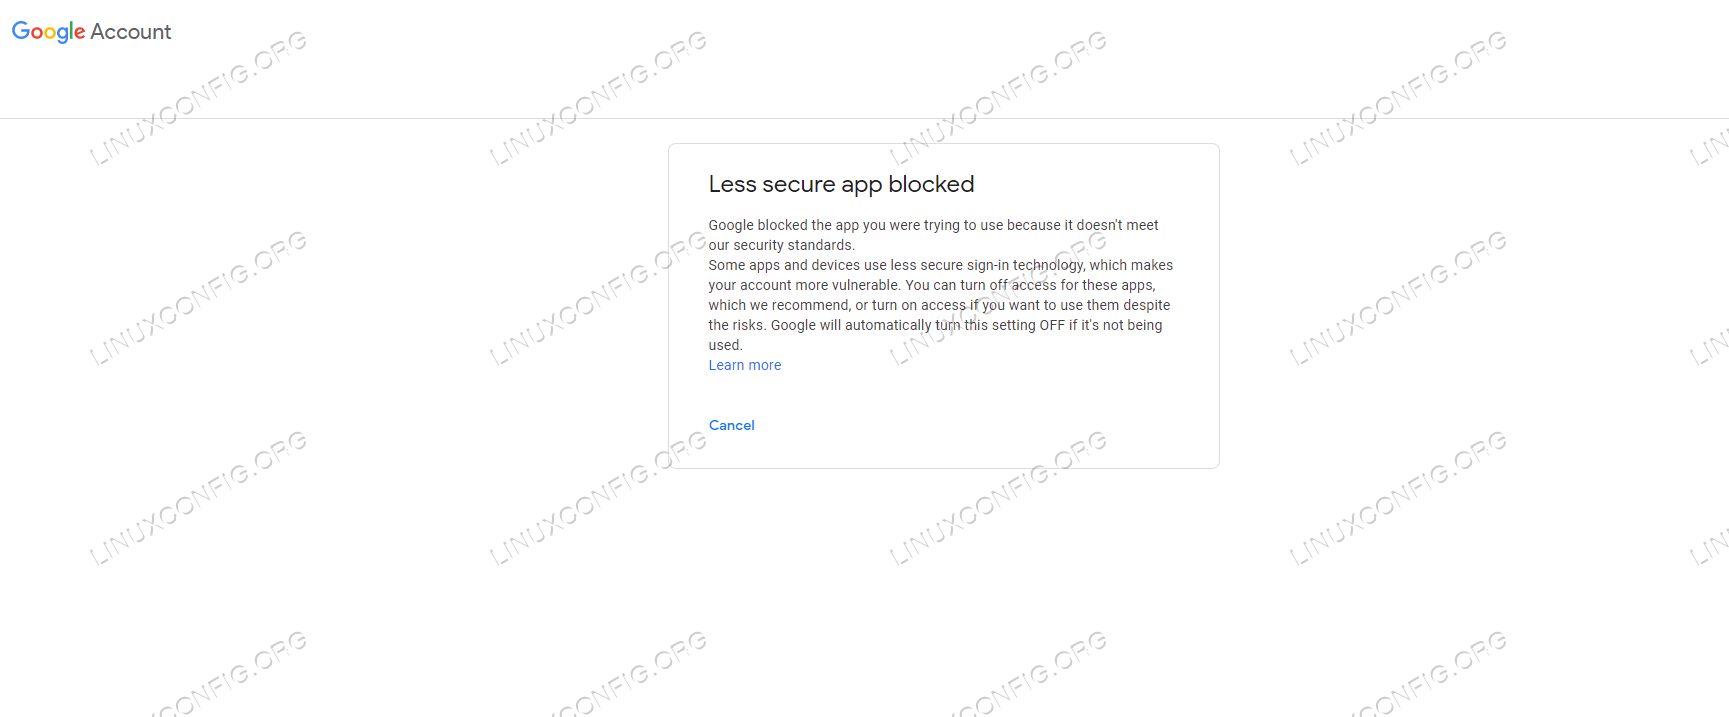
In our testing for this article, we also had to enable a setting to “allow less secure app access” on our Gmail account. You may or may not be required to enable this as well. Before enabling the setting, we received the following notification from Google when trying to send an email with Sendmail:
We had to verify, through automated prompts, that the email attempt was legitimate, and not the result of our account being hacked.
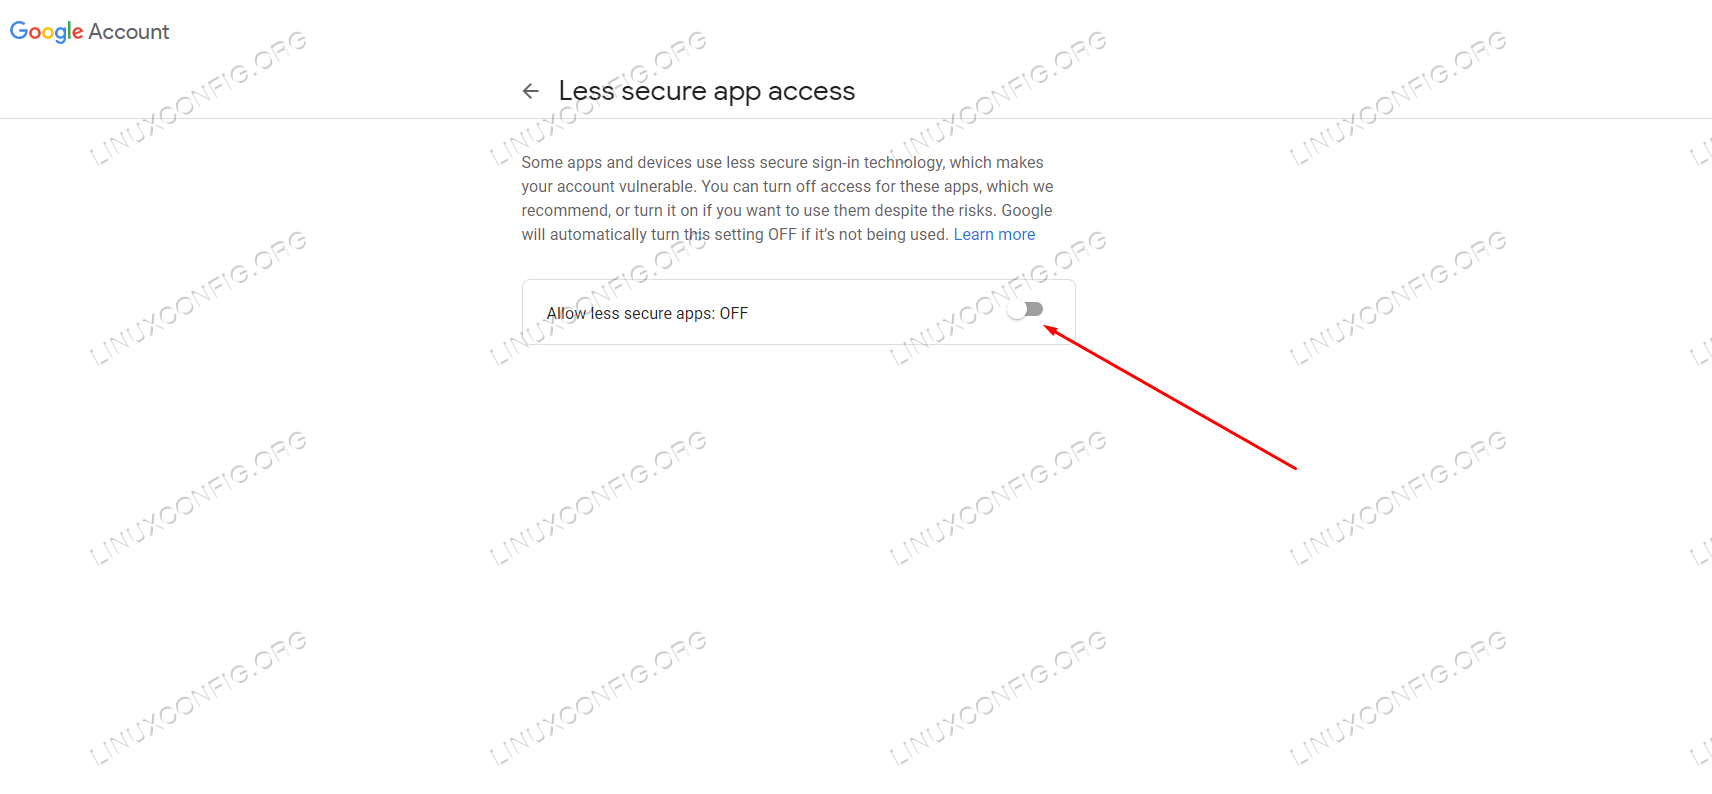
In order to remedy the issue, you need to read this Gmail support article and click the link there to allow “less secure app access.”
After changing this setting, we were able to send emails using Sendmail and our configured Gmail relay. Your mileage may vary, so it’s best to just try the guide without enabling this setting first. Then, if you have to, you can go back and enable the setting.
Install Sendmail
You can use your system’s package manager to install the Sendmail packages you’ll need for the guide. Use the appropriate command below to install the necessary software.
To install Sendmail on Ubuntu, Debian, and Linux Mint:
$ sudo apt install sendmail mailutils sendmail-bin
To install Sendmail on CentOS, Fedora, AlmaLinux, and Red Hat:
$ sudo dnf install sendmail
Create Gmail authentication file
Follow the steps below to configure Gmail as a relay for Sendmail.
- The first thing we should do is elevate to the root user, as most of
these commands will require root access – even when changing
directories where needed.
$ sudo -i
Or, if sudo is not configured for your user account:
$ su
- Next, make a new directory where we will store the Gmail configuration file, then change into it.
# mkdir -m 700 /etc/mail/authinfo/
# cd /etc/mail/authinfo/
- Next, create a new file with nano or your preferred text editor that
will contain our authentication info. To keep it simple, we’ll call
ours
gmail-auth.# nano gmail-auth
- Inside this file, paste the following template and then edit it with
your own information. Specifically, enter your Gmail address and
password. Please note that in the below password example you need to
keep ‘P:’ as it is not a part of the actual password.
AuthInfo: "U:root" "I:YOUR GMAIL EMAIL ADDRESS" "P:YOUR PASSWORD"
Save your changes and exit the file when done.
- The last step is to create a hash map for the above authentication file.
# makemap hash gmail-auth < gmail-auth
Now that the Gmail authentication is setup, we can move on to configuring Sendmail.
Configure Sendmail
- Next, edit the file in
/etc/mail/sendmail.mcwith your preferred text editor.# nano /etc/mail/sendmail.mc
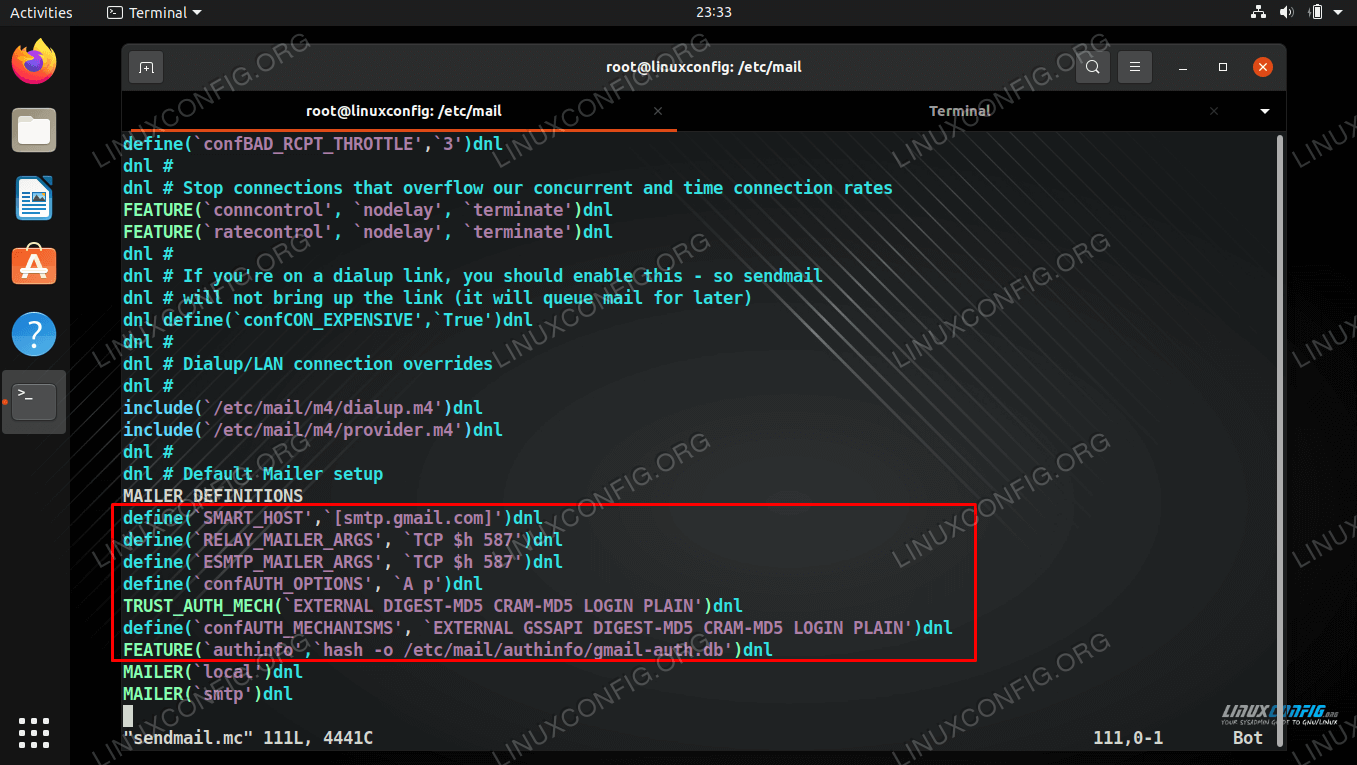
- Then paste the following lines right above first “MAILER” definition
line. Where you place these lines is very important, so see the
screenshot below for reference.
define(`SMART_HOST',`[smtp.gmail.com]')dnl
define(`RELAY_MAILER_ARGS', `TCP $h 587')dnl
define(`ESMTP_MAILER_ARGS', `TCP $h 587')dnl
define(`confAUTH_OPTIONS', `A p')dnl
TRUST_AUTH_MECH(`EXTERNAL DIGEST-MD5 CRAM-MD5 LOGIN PLAIN')dnl
define(`confAUTH_MECHANISMS', `EXTERNAL GSSAPI DIGEST-MD5 CRAM-MD5 LOGIN PLAIN')dnl
FEATURE(`authinfo',`hash -o /etc/mail/authinfo/gmail-auth.db')dnl
Save your changes to the file and exit it when done.
- In the next step we will need to re-build sendmail’s configuration. To do that execute:
# make -C /etc/mail
- Now, reload the Sendmail service for all of our changes to take effect.
# systemctl restart sendmail
Note that the service will try to resolve your fully qualified domain name. If it’s not configured, the process may hang for a minute, but it will eventually start. Check the status of the Sendmail service to get a report on any errors it encounters.
# systemctl status sendmail
Configuration test
Now you can send an email from your command line using the mail command:
$ echo "Just testing my sendmail gmail relay" | mail -s "Sendmail gmail Relay" my-email@my-domain.com
Once again, you may experience a little delay if there’s a problem resolving your fully qualified domain name. Regardless of whether you’ve configured it correctly, or if you even HAVE a domain name, the email should still send successfully.
Closing Thoughts
In this guide, we saw how to configure Gmail as an email relay for Sendmail. This is a great configuration to implement when you need to send emails from the command line. It works well for Bash scripts or for websites that need to send out emails, and Gmail works as a reliable email relay. The only thing to keep in mind is that you may have to configure the “less secure apps” setting in Gmail, and ideally you want to have your system configured properly with a fully qualified domain name to avoid any delays or having your email sent straight to spam.


Comments
Post a Comment