How To Install Jenkins on Ubuntu 22.04
Prerequisites
To follow this tutorial, you will need
- One Ubuntu 22.04 server configured with a non-root sudo user and firewall by following the Ubuntu 22.04 initial server setup guide. We recommend starting with at least 1 GB of RAM. Visit Jenkins’s “Hardware Recommendations” for guidance in planning the capacity of a production-level Jenkins installation.
Oracle JDK 11 installed.
Step 1 — Installing Jenkins
The version of Jenkins included with the default Ubuntu packages is often behind the latest available version from the project itself. To ensure you have the latest fixes and features, use the project-maintained packages to install Jenkins.
First, add the repository key to your system:
$ wget -q -O - https://pkg.jenkins.io/debian-stable/jenkins.io.key |sudo gpg --dearmor -o /usr/share/keyrings/jenkins.gpg
The gpg --dearmor command is used to convert the key into a format that apt recognizes.
Next, let’s append the Debian package repository address to the server’s sources.list:
$ sudo sh -c 'echo deb [signed-by=/usr/share/keyrings/jenkins.gpg] http://pkg.jenkins.io/debian-stable binary/ > /etc/apt/sources.list.d/jenkins.list'
The [signed-by=/usr/share/keyrings/jenkins.gpg] portion of the line ensures that apt will verify files in the repository using the GPG key that you just downloaded.
After both commands have been entered, run apt update so that apt will use the new repository.
$ sudo apt update
Finally, install Jenkins and its dependencies:
$ sudo apt install jenkins
Now that Jenkins and its dependencies are in place, we’ll start the Jenkins server.
Step 2 — Starting Jenkins
now that Jenkins is installed, start it by using systemctl:
sudo systemctl start jenkins.service
Since systemctl doesn’t display status output, we’ll use the status command to verify that Jenkins started successfully:
$ sudo systemctl status jenkins
If everything went well, the beginning of the status output shows that the service is active and configured to start at boot:
Output
● jenkins.service - Jenkins Continuous Integration Server
Loaded: loaded (/lib/systemd/system/jenkins.service; enabled; vendor preset: enabled)
Active: active (running) since Mon 2022-04-18 16:07:28 UTC; 2min 3s ago
Main PID: 88180 (java)
Tasks: 42 (limit: 4665)
Memory: 1.1G
CPU: 46.997s
CGroup: /system.slice/jenkins.service
└─88180 /usr/bin/java -Djava.awt.headless=true -jar /usr/share/java/jenkins.war --webroot=/var/cache/jenkins/war --httpPort=8080
Now that Jenkins is up and running, adjust your firewall rules so that
you can reach it from a web browser to complete the initial setup.
Step 3 — Opening the Firewall
To set up a UFW firewall, visit Initial Server Setup with Ubuntu 22.04, Step 4- Setting up a Basic Firewall. By default, Jenkins runs on port 8080. Open that port using ufw:
$ sudo ufw allow 8080
Note: If the firewall is inactive, the following commands will allow OpenSSH and enable the firewall:
$ sudo ufw allow OpenSSH
$ sudo ufw enable
Check ufw’s status to confirm the new rules:
You’ll notice that traffic is allowed to port 8080 from anywhere:
Output
Status: active
To Action From
-- ------ ----
OpenSSH ALLOW Anywhere
8080 ALLOW Anywhere
OpenSSH (v6) ALLOW Anywhere (v6)
8080 (v6) ALLOW Anywhere (v6)
With Jenkins installed and a firewall configured, you have completed the installation stage and can continue with configuring Jenkins.
Step 4 — Setting Up Jenkins
To set up your installation, visit Jenkins on its default port, 8080, using your server domain name or IP address: http://your_server_ip_or_domain:8080
You should receive the Unlock Jenkins screen, which displays the location of the initial password:
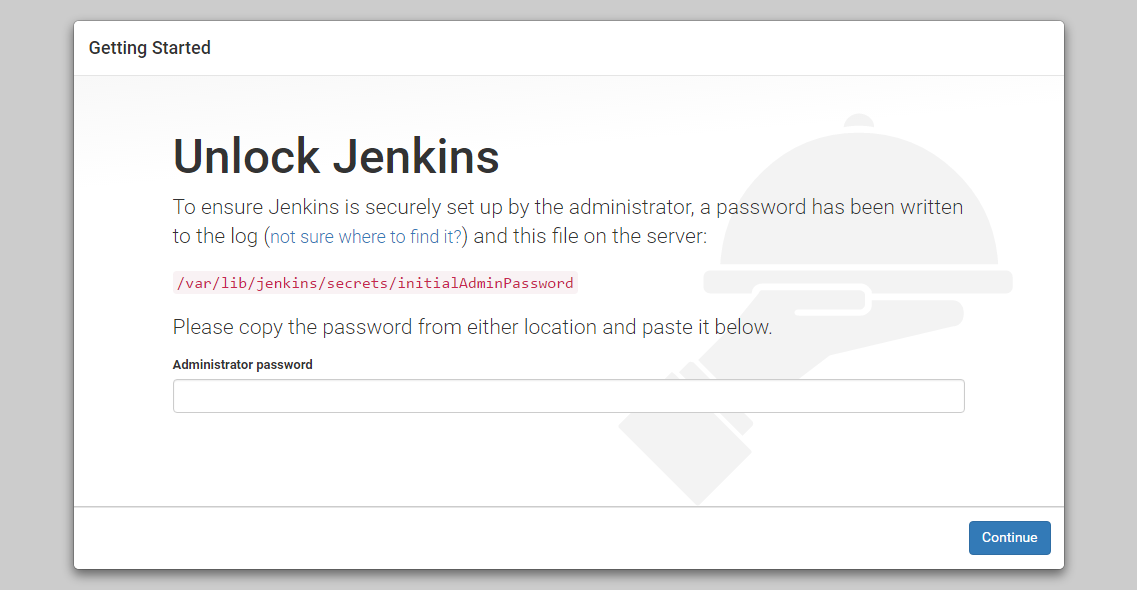
In the terminal window, use the cat command to display the password:
$ sudo cat /var/lib/jenkins/secrets/initialAdminPassword
Copy the 32-character alphanumeric password from the terminal and paste it into the Administrator password field, then click Continue.
The next screen presents the option of installing suggested plugins or selecting specific plugins:

We’ll click the Install suggested plugins option, which will immediately begin the installation process.

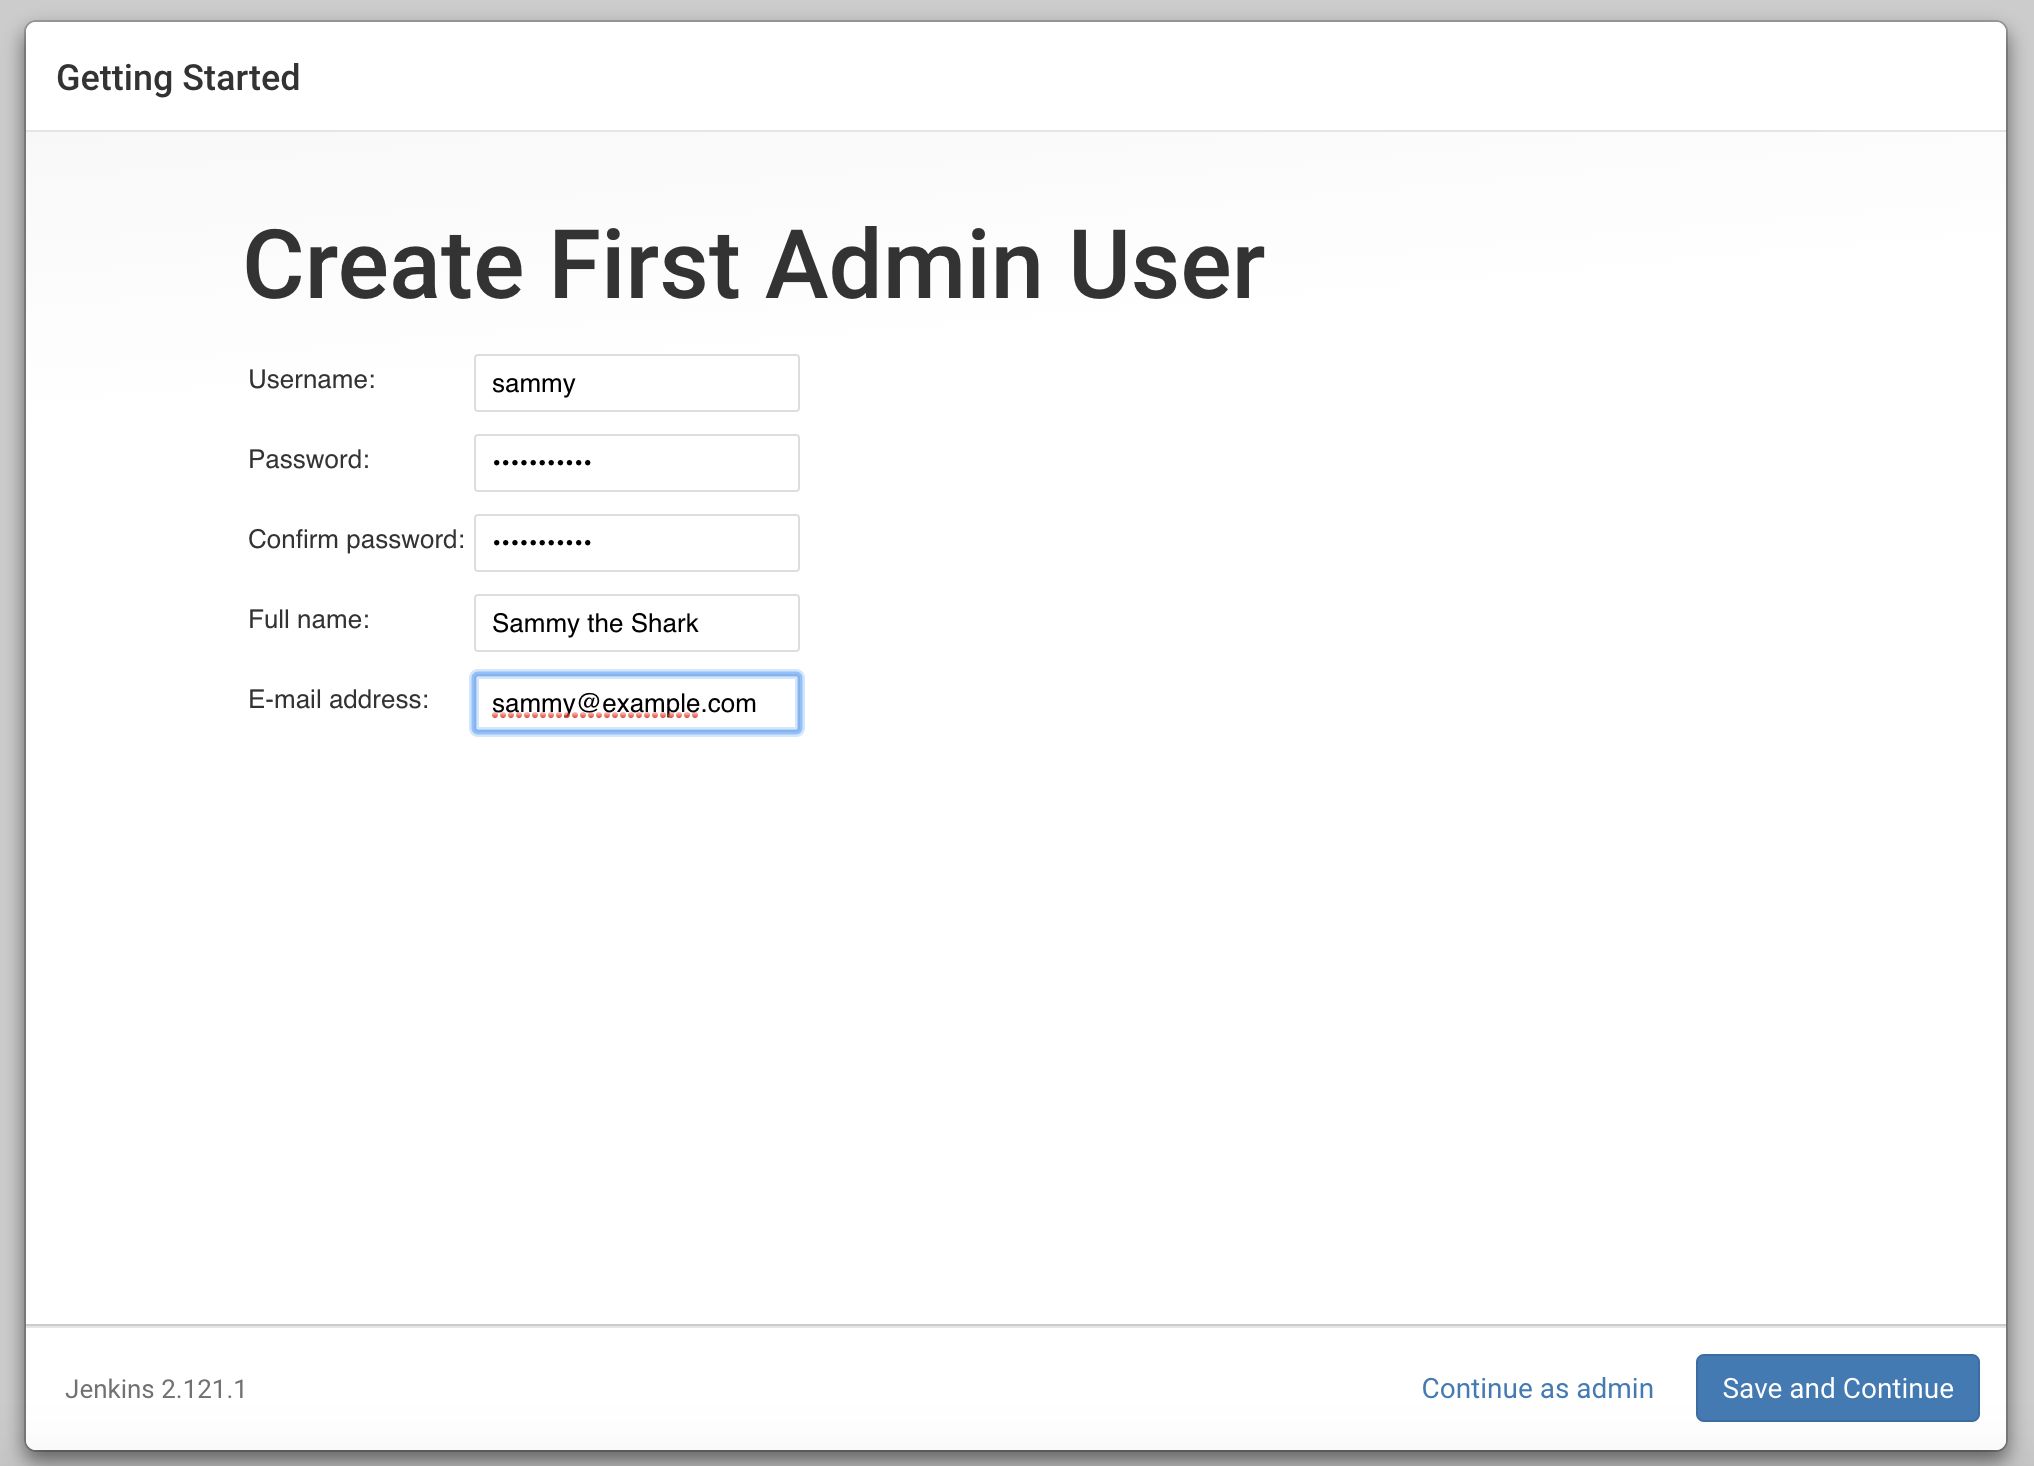
When the installation is complete, you’ll be prompted to set up the
first administrative user. It’s possible to skip this step and continue
as admin using the initial password from above, but we’ll take a moment to create the user.

Enter the name and password for your user:
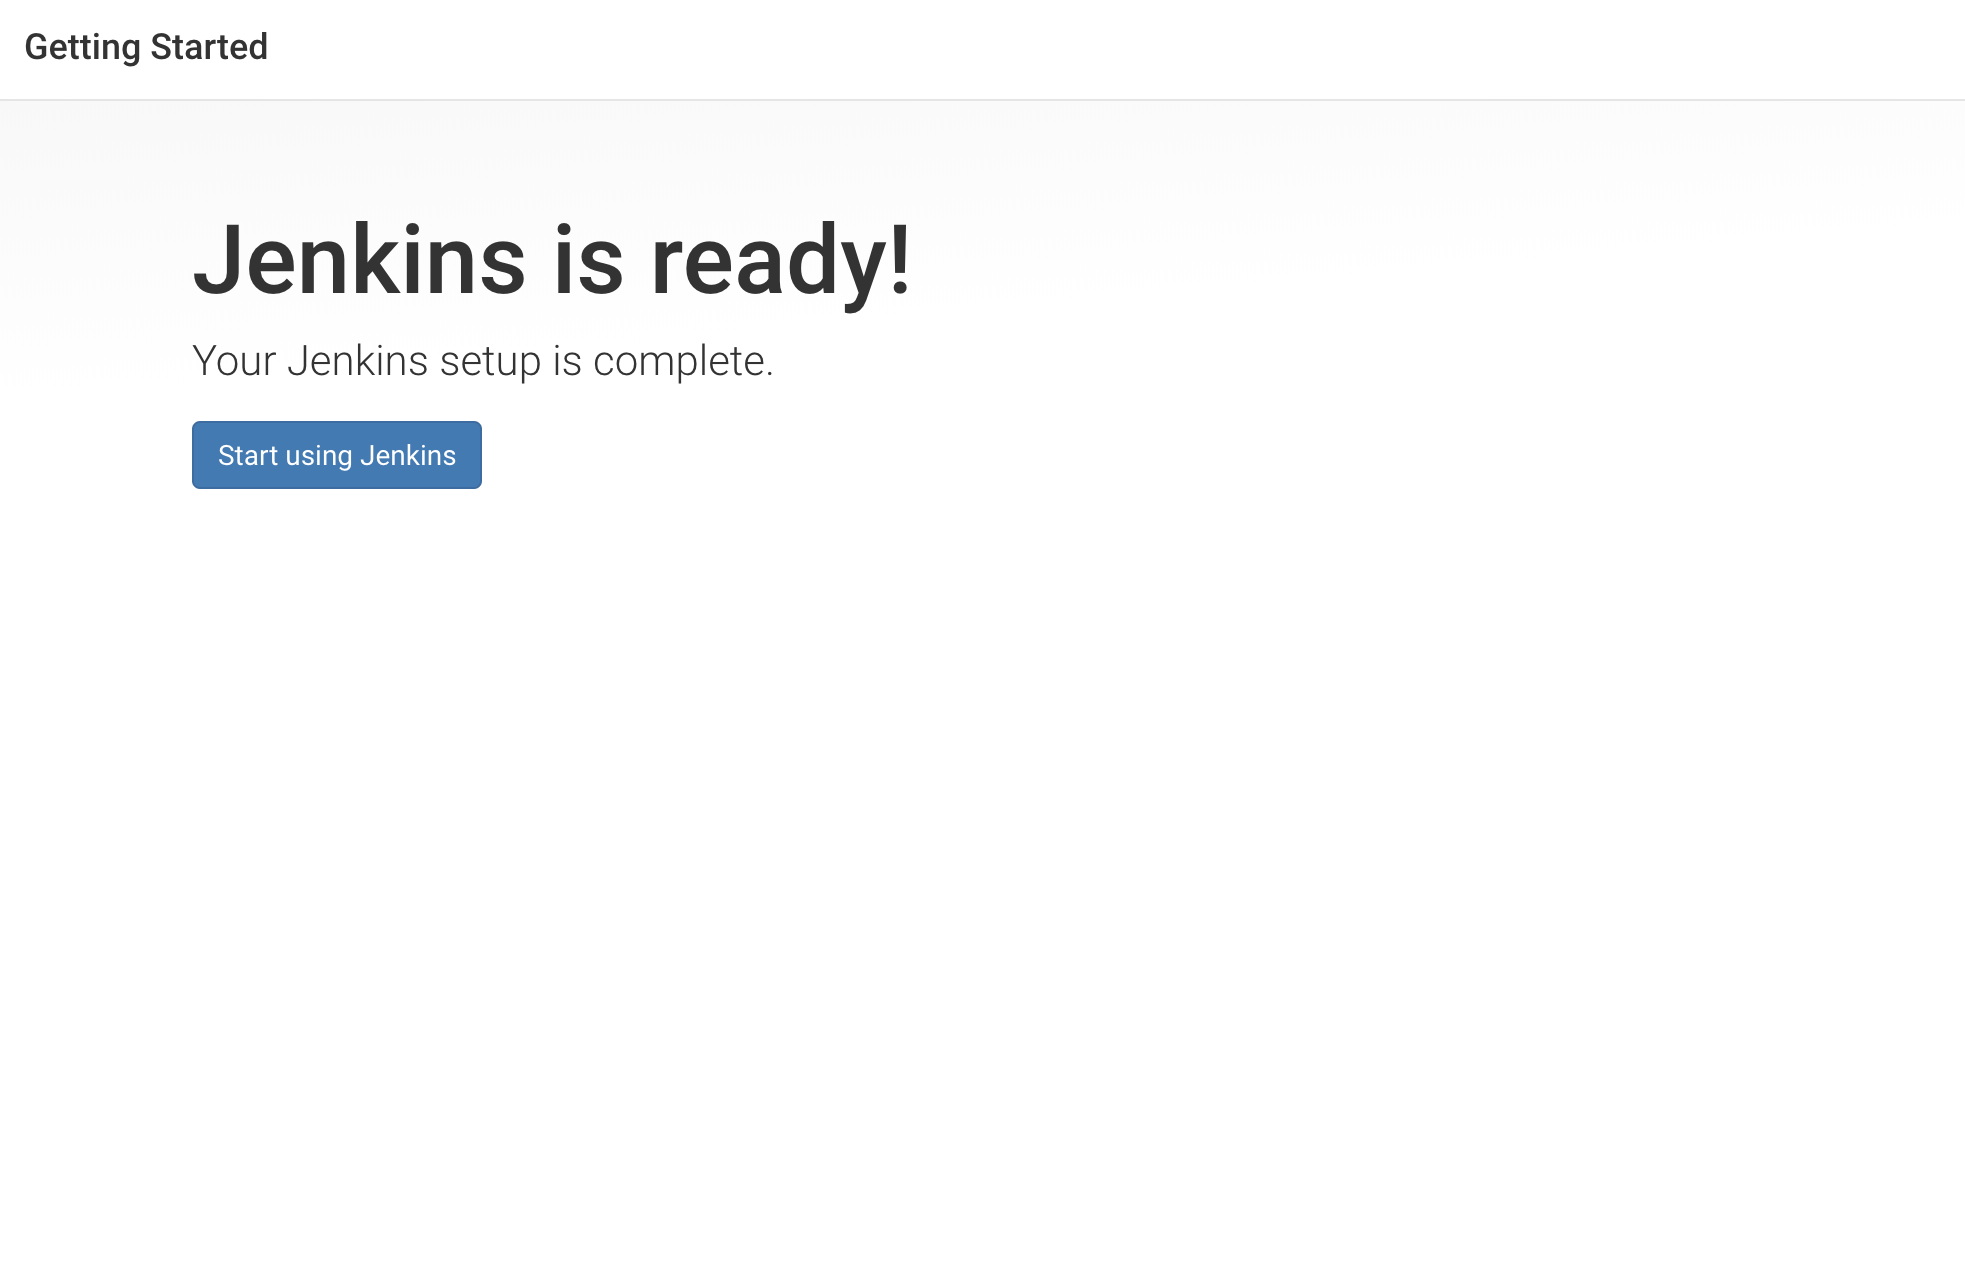
You’ll receive an Instance Configuration page that will ask you to confirm the preferred URL for your Jenkins instance. Confirm either the domain name for your server or your server’s IP address:

After confirming the appropriate information, click Save and Finish. You’ll receive a confirmation page confirming that “Jenkins is Ready!”:
Click Start using Jenkins to visit the main Jenkins dashboard:
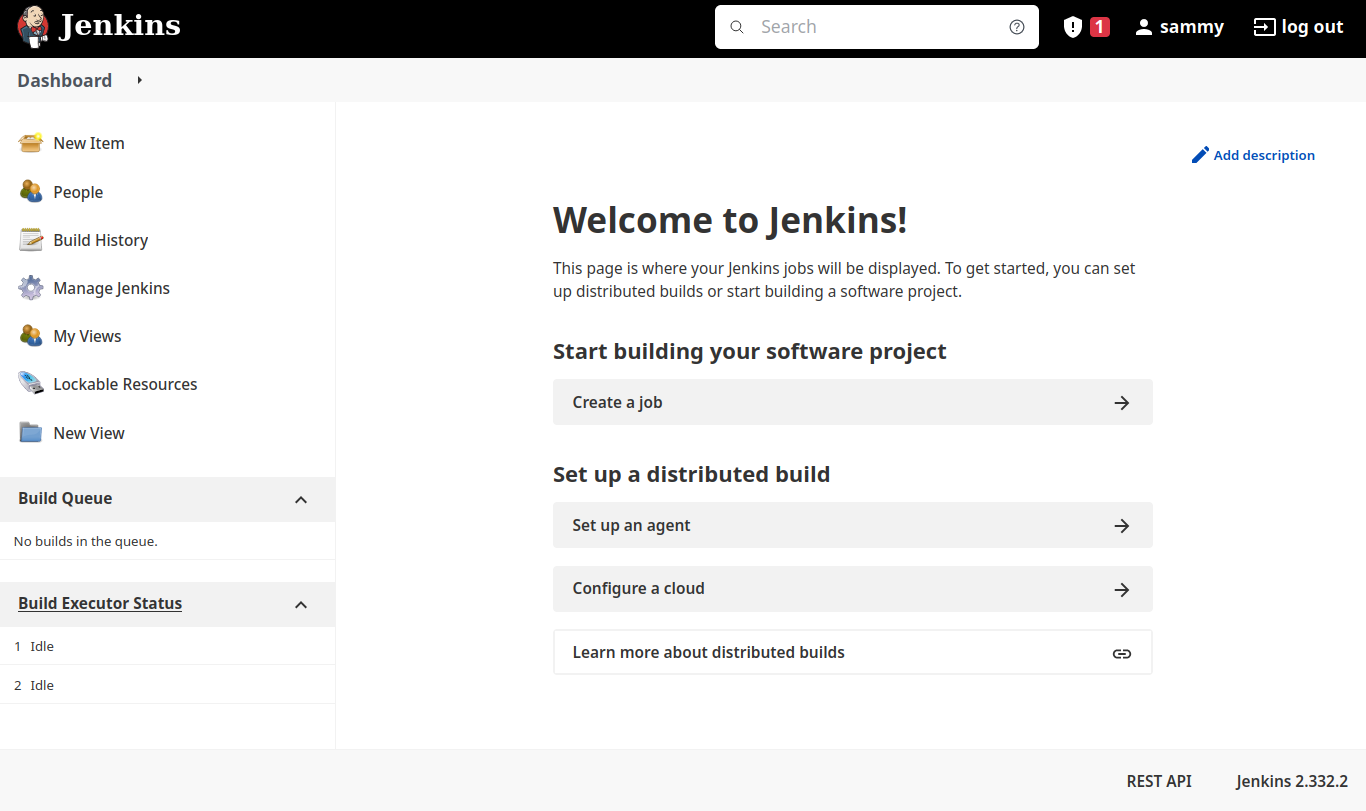
At this point, you have completed a successful installation of Jenkins.
Comments
Post a Comment